
Last week's was my last post on crocheting for the year -- and probably for a few weeks afterwards. Christmas is coming. Then in mid-January, we're moving.
But, I thought I'd share with you all a few knitting links that I recently found and that sort of fit with the Bits and Bobs format. (By the way, I don't know of anyone about to have a baby. But, I know several people who know someone about to have a baby.)
First come a couple of links from Fleegle. I've been reading her blog for quite a while -- not from the beginning but still quite a while. (The first post on the blog is an ingenuous way for making toe-up socks.) But, the links I want to direct you to are a couple of posts on baby booties -- a seamless bottom-up "regular" bootie and a seamless (Sartjees) one with buttons.
The other is a link to a Tetris baby blanket. It seems to me to be a great way to use up yarn. (One wouldn't have to do the Tetris blocks in the same color each time.)
Tuesday, December 18, 2007
Tuesday, December 11, 2007
Slip Stitch
 The project we're working on has an edging on just one edge. But, what if one wants to put an edging all around.......
Here's an example of this -- a blanket with a single crochet edging.
To make it easier to add a crocheted edging, I used a chain stitch selvage when knitting-- I.e., I knitted the last stitch of every row and slipped the first stitch of every row purlwise with yarn in front -- on both right and wrong side rows.
To make the single crochet edging: Start with a single loop on the hook, just as you did when starting the edge for the terry towel dish towel. Single crochet around. This time there is no need to make any chain stitches. I used a size 10 needle for the knitting part and a size H crochet hook for the crochet part. Make 1 single crochet under each (double) loop of the chain stitch selvage and 1 single crochet under the bottom/top of each stitch from the cast on/bind off edge. To turn the corner, single crochet 3 times in the same place. The picture shows a corner with the extra stitches (to make it lay flat) and a sc in process of being created.

When you get back to the first stitch worked, you need a way to join the edge together. The answer is the slip stitch. It's almost invisible.
Most stitches are worked by slipping the hook under both loops at the top of a stitch (unless you want a ribbed effect). For a slip stitch (slip st), place the hook under the back loop only. Yarn over. Then draw the yarn through both loops. NexStitch has a video of the stitch plus other uses for the slip stitch.
edited March 2008: In England, this stitch is called a single crochet stitch.
Finish off the piece essentially as you would a piece of knitting. Elongate the last loop and snip off the yarn just as in knitting. Then weave it in just as you would for knitting. NexStitch has a video of weaving in the ends. I dislike needles and so use a crochet hook to pull the yarn through.
 If this were crocheted back and forth, I would do exactly as the video shows (except for using a hook instead of a needle). Since this is crocheted in the round, I would weave the yarn around the first few stitches made in the round instead of the last few.
Here is the finished piece, not yet blocked. The slip stitch join is in the upper right hand corner. The bottom of the picture shows what the wrong side of a single crochet stitch looks like.
 Here is a picture from the American Thread Company booklet describing the slip stitch.
Tuesday, December 4, 2007
Double Crochet Stitch
 The double crochet stitch is about twice the height of a single crochet stitch. (It is called a triple or treble crochet stitch in England and several Commonwealth countries and is abbreviated tc or 3-c.) In American notation, it is abbreviated dc. The photo at the right is from the American Thread Company booklet and describes the stitch.
 In the photo, you can see both the right sides of dc sts (the top row) and the wrong sides (the bottom row).
NexStitch has a video of the stitch. The video shows the dc being made in a chain st (with the hook being put under just one loop of thread). In the pattern we're working on, the dc is made on top of a sc and so (since we want a flat effect instead of a rib effect), put the hook under both loops at the top of the sc. -- For a further discussion, look at the last 2 paragraphs of the previous article on crocheting.
The single crochet stitch took 2 steps to complete. The double crochet stitch takes 4 steps. As with most, if not all, crochet sts, one starts with a single loop around the hook -- and ends with a single loop around the hook.
Step 1. Yarn over (yo). That is, wrap the thread around the hook (from the back over the hook to the front). There are 2 loops on the hook.
 Step 2. With the yarn in back, put the hook through the top of the desired st -- or whatever (as you did for a single crochet st), yo, and draw the thread through. There are now 3 loops on the hook.
The picture at the right shows the yo in Step 1 and the hook through the top of the stitch that I wanted to dc into. (I skipped 2 sts between dc's because that's what the pattern I'm making calls for.)
Step 3. Yarn over and draw the thread through 2 loops on the hook. There are now 2 loops on the hook.
 Step 4. Yarn over and draw the thread through 2 loops. There is now only 1 loop on the hook, and the double crochet is complete.
The picture at the right shows the yo in Step 4. You'll notice that bottom half of the stitch is already made.
-----------
 Now to get back to the terry cloth dish towel that we were working on. The final picture shows the end of the row of sc's from the directions from last week. The next row of work is a row of dc's and ch's -- to give an open mesh effect.
Row 3. Turn, ch3, dc in next st in previous row, *ch 1, skip 2, dc 1* across, dc in last st.
To explain these steps:
Turn -- Turn the fabric so that now the RS is facing you. We were working on the WS.
Ch 3: Chain 3, as a substitution for a dc.
dc in next st in previous row: Don't dc in the last st of the last row but rather one stitch over. (Sometimes, one just writes dc instead of dc 1.)
*ch 1, skip 2, dc 1* The pattern that is repeated across the row is to first chain 1, the double crochet in the 3rd stitch over from the last stitch crocheted into (to skip 2 sts).
Finally, the pattern will, in most likelihood, not work out exactly. So, you can fudge by skipping only 1 st before making the last two dc's of the row or else by ending dc, skip 1, dc. -- As was the case in the last row, there are fewer sts across than in the previous row.
Monday, November 26, 2007
Single Crochet -- Part 2
 In the last installment, we talked about making single crochet stitches with either no foundation row (just a piece of cloth) or a chain stitch foundation. In this installment, we'll talk about making single crochet stitches in the top of a stitch or in a chain space.
First to recap about making sc's in ch sts. --- Here's the 6-foot chain again. This time it's much different. It's wider and a lot sturdier. I used the technique in the last picture of the last installment to single crochet in each chain stitch of the chain (except, of course, the one used in turning the work). You'll notice that it curls a lot. That can be fixed by blocking.
I've also made progress on the terry cloth dish towel. I've done sc 1, *ch 2, sc 1* to the end. That was the first row (done on the right side of the fabric). Also, all the sc's were made into the fabric.
 Next ch 1 and turn the work. (The ch 1 is a substitute for the first stitch in this next row -- a row of single crochet stitches.) Then single crochet twice into each chain space. In the picture, I've already worked 3 chain spaces and am preparing to sc in the next chain space. (This is the beginning of Step 1. Step 2 is done just as before.) When I get to the end, I'll single crochet into the top of the last st (which was the first st of the previous row).
Row 2: Turn, ch 1, sc 2 in each ch sp across, sc in last st.
You're probably thinking that you'll end up with fewer stitches than you started out with. And you'd be right. The number of stitches will be decreased by about a third.
If I had wanted to keep the same number of stitches, I would have done one of the following:
Turn, ch 1, *sc 2 in each ch sp, sc in next sc* across
or
Turn, ch 1, sc 3 in each ch sp across
or
Turn, ch 1, sc in each st across
I would have taken the first option. First of all, it's easier to sc into a ch sp than a ch st. Second, it keeps the sts lined up vertically.
Finally, a word about what the top of a stitch looks like. It looks like a chain selvage on the edge of a knitted garment. When the directions say to sc into the next sc, it means to put the hook under the 2 loops on the top of the stitch (as part of Step 1). Then do Step 2 as usual. It really doesn't matter how you crochet the last st of this row, though, since it will be hidden by the edging.
Here, (a rippled afghan) is an example of what a crocheted piece looks like when one crochets in the back loops only instead of both loops.
Thursday, November 22, 2007

Tuesday, November 20, 2007
Single Crochet Stitch
 The single crochet stitch is abbreviated sc in patterns as in sc 2 in next ch sp (single crochet twice in the next chain space) or sc 3 in next st (single crochet 3 times in next st).
A word of warning: This is American terminology. The British term for the same stitch is double crochet (dc).
As with all crochet stitches, one starts with a single loop on the hook. In the picture at the right, I started with a loop created by making a slip stitch knot around the hook (just as one often does in starting a cast on in knitting).
There are 2 steps to making the stitch.

First, with the yarn in back, draw a loop through. In this case, I used the crochet hook to poke a hole through the terry cloth dish towel. Then I wrapped the thread around the hook and pulled the thread through. (Terry cloth is woven loosely and so it is possible to poke holes through it without snagging the fabric.) There are now 2 loops on the hook.
Second, wrap the thread around the hook again (as in the first picture) and then pull the thread through both loops.
The stitch is complete and one is left with one loop on the hook.
To make the edging, I then did 2 chain sts before making the next single crochet.
sc 1, *ch 2, sc 1* to end
The second picture show several repeats of the pattern, ending with a chain 2. The chain 2 forms what is called a chain space. I did it this way to space out the single crochet stitches.

I hope you were able to make a 6 foot long chain of chain stitches. Here is mine. But, it looks so thin. To remedy that, let's single crochet back.
The video at NexStitch shows how to do just that. The last picture in this post (from the booklet from the American Thread Company) also shows how.
Remember when starting a row to skip the first st. The last chain st made (at the end of the previous row) serves as a replacement for the first sc (at the beginning of the next row).
 We've talked about how to single crochet. We've also seen how to single crochet into fabric and into chain stitches.
Next time, we'll talk about how to single crochet into a chain space and also how to crochet into the top of a single crochet stitch.
Wednesday, November 14, 2007
Are you looking for some fast crafting ideas that don't take a lot of time or materials? Part 6
 Christmas Pattern
 Christmas Crackers
And an early one for Valentine's Day:
 Valentine Roses
I hope you have enjoyed this series of patterns.
Cora


Tuesday, November 13, 2007
The Chain Stitch
 In patterns the chain stitch is abbreviated ch -- as in "ch 3" for chain 3 sts or "skip 1 ch" as an instruction to skip the next st (which happens to be a chain st)
The first step is to make a slip stitch on the hook (the same way one would make a slip stitch for knitting). Here is a video on making a chain stitch from Nexstitch. It doesn't start with a slip stitch, however. It has an ingenious way to start without making a slip stitch.
Or, in words, how to hold the yarn and start to chain, quoting from the booklet from the American Thread Company (since it describes how to wrap the yarn around the hand better than I can.)---- This quotation starts after instructions on how to make a slip knot and assumes that the thread is already hanging from the hook.
"Hold the hook in right hand as you would a pencil, bringing the middle finger forward resting it about midway between the broad bar and top of hook. With the thread in back of hand, place thread between fourth and little finger, across palm side of fingers and over fore-finger, if more comfortable, wind thread over finger once. Do not hold thread too tightly. Hold the hook in left hand, insert hook in loop, pick up the main length of thread on hook (this is termed 'thread over' ...) and pull through loop. Repeat this ch for required length. On this foundation chain may be worked practically any stitch desired."

I hold yarn for crocheting the same way I hold yarn for knitting. (I'm a Continental style knitter.) I hold a crochet hook slightly differently than I do a knitting needle. For crocheting, I have my middle finger farthest toward the end of the hook. For knitting, I have my index finger farthest toward the end of the needle. The fingers in the left hand are also used to pull the thread downward a bit to make it easier to pull the yarn through. Note also that the yarn starts out behind the hook.
----
The chain stitch is a multi-purpose stitch. It serves the same purpose as the cast on in knitting in that it can and usually is used as a foundation row. It also serves the same purpose as the yarn over in knitting in that it's used to make crocheting more lacy. It's used to make picots. It's also used as a substitute for other stitches at the beginning of a row. Instead of making a single crochet at the beginning of a row, one might be asked to chain 1 (or 2). Instead of making a double crochet at the beginning of a row, one might be asked to chain 2 (or 3). (Some people use the lower number -- because a ch 1 is the same length as a single crochet is in height. Some people use the higher number.) I also use chain stitches when I'm going to put crocheting down for a while. I chain a few stitches loosely so that if it unravels, I won't lose any of my work. Then before beginning again, I undo the chain.
Things do even out. Double or triple crochet stitches are often substituted for chain stitches at the end of a row or round.
Our Bits and Bobs "Mom" has posted a CAL that uses chain stitches and would be great practice in chaining. (For beginners, chaining a chain 6 feet long instead of single crocheting a chain 6 feet long is much easier. For those wanting a challenge, here is a link on single crocheting a chain.)
Finally, next Tuesday, I'm going to post directions on making a border on a dish towel. For this, you'll need a terry cloth dish towel (to be cut in half), a size 7 crochet hook, and size 10 crochet thread (100% mercerized cotton). The hook and crochet thread could also be used for the CAL.
Thursday, November 8, 2007
Have you done Cross-Stitch and found it to time consuming?

This is a a really great technique and one I am going to try on an ornament later. This ornament is available in the 2007 Christmas Ornaments from the Just Cross Stitch Magazine. Wish me luck.
Stitch 'N Paint is quick option for cross stitchers. This is a technique I found on Leisure Arts website. They have PDF of how to do this.
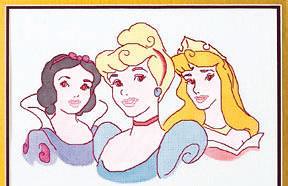
As you can see they have done this with not only small pictures such as the sun, but with Disney charachters like Eeyore and the Princesses.

If anyone does this technique, please share with us, especially pictures.
Cora
B&B SUPERFAST CAL!
The Materials List is similar to that for the Ravelry KAL
MAterials:
Thin yarn
Crochet hook
balloon
elmers glue
water
bowl
Instructions:
Make a chain 6 feet long.
That's right folks SIX FEET LONG! LOL!!!
Now inflate the balloon. Make a mixture of glue and water 1-1 ratio. Dip the balloon in the water and begin wrapping the chain all around the balloon. Any way you like. once the chain is completely wrapped up lightly apply the mixture to firm it. or you can use spray starch instead. add a coat and dry it, and repeat until it is really firm. Then apply tape to the balloon, and pierce the balloon through the tape. Remove the deflated balloon and attach an ornament hook. Crocheted Christmas Ornament!
Bits And BobS UnRavelled KAL Update
Ok the Ravelry group has started their KAL!
Materials List:
Thin Yarn or Crochet Thread
Size 8, 9,10, or 11 Needles, whichever you prefer
1 Balloon
Elmers glue
A bowl
Water
Scotch Tape
A sewing needle
Basic Instructions:
Knit 50 rows
Bind off.
You can add beads if you like as you knit using the crochet hook method:
Slide an appropriately size seed bead onto your crochet hook.
Pick up stitch off of the left needle using a size 1 crochet hook. Slip the bead off of the crochet hook and onto the stitch that you are holding with the hook. Replace the stitch on the left hand needle. Add beads as you see fit.
Fold the piece in half lengthwise and stitch together. Seam up the top as well insert balloon and inflate to desired size. Then seam up the bottom.
Mix water and glue to a thin consistency. 1 part glue to 1 part water. Dip the balloon in the mixture and let dry. Repeat several times until your knitting is super stiff. you can even sprinkle with glitter while it is wet after the final dip if you like.
Once it is dry and firm. Place a piece of tape on the baloon and insert a needle through the tape. This lets the air out without popping the balloon. Remove deflated balloon and attach and ornament hook.
A lovely lace Christmas Ornament!
Tuesday, November 6, 2007
"Crochet is Quick"
 This is the first installment in several on crocheting. I recently found a booklet , which belonged to my MIL, on knitting and crocheting (or at least the middle 20 or so pages) from, I believe, the American Thread Company (The first 6 pages are missing.). The booklet appears to be over 50 years old. The title of the section on crocheting is "Crochet is Quick".
I'll be posting parts of the booklet. Later, I'll also post directions for edgings -- since knitters occasionally used crocheted edgings to prevent curling -- and other projects (as the mood hits me). The first project is pictured at the right.
But, before we begin, we need some basics:
"What You Need and How To Begin
"Materials
"Crochet work takes its name from the hook with which it is done. It is one of the oldest and most useful needle work arts. It is composed of a few foundation stitches by which every design may be developed.
"Crochet Hooks used, differ in size according to the material and object to be worked. The largest, usually of Composition, Bone, Ivory or Wood are used for the heavier kind of work in wool or heavy cotton, steel hooks are preferred for finer types of Crochet in cotton. The Afghan needle is longer than usual and is the same thickness throughout.
"Crochet threads vary as to twist, size and color. Whenever possible, use the thread recommended in the directions and be sure you purchase a sufficient quantity of the same dye lot. This applies to all colors, including Cream, Linen and Ecru. Wherever 'Gauge' appears, it is important that it be followed.
"Needle gauge means the number of stitches worked to one inch and the number of rows worked to one inch. It is wise to work about a two inch square with the thread and needle recommended. If the stitches per inch do not correspond, the size of needle must be changed. If there are more sts to the inch than given, use a larger hook, and if fewer stitches to the inch, use a smaller hook. Practice until correct gauge is obtained."
Tuesday, October 23, 2007
Bear with me
Please bear with me as I get everything up and runing. The poll at Bits and Bobs will be closed tonight or this afternoon depending on when I get to it. And based on those votes we will begin organizing the Newsletter format for the blog. I will be opening up a database for members to sign up to help run the blog. Until then please be patient with me and forgive the limited posts for the time being. I promise once everything is worked out it will be great!
Monday, October 22, 2007
Into the Fray is up and running!
The new fiber arts discussion board "Into the Fray" is now up and running, soooo lets get some members in there and start some threads! I have a few intros to get you up and running. This discussion board is for all fiber arts, and there are sections for each. Check it out! And make sure to bookmark it so you can find it again!
It is pretty bare bones right now, but you know me, I will be tweaking it and adding more as we go along. If there is a lot of interest I may eventually upgrade.
Have fun in there!
It is pretty bare bones right now, but you know me, I will be tweaking it and adding more as we go along. If there is a lot of interest I may eventually upgrade.
Have fun in there!
Friday, October 19, 2007
Knit 1 blog Too Net Ring Temporarily Closed to New Members
I am planning on adding our frinedly little blog to the Knit1BlogToo Ring as soon as possible. However it has been temporarily closed to new members until November. So we really don't have too long to wait. Jsut as soon as they open membership again I will get our blog on there.
Also,
Related news. I am considering opening a knitting forum for members of all of my groups. It would be a simple basic forum for web reading only. It would have areas designated for each group to chat in (you can meet people in other groups as well) and there would be sub topics that you can post and chat in. This would help cut down on the extra email in our groups. What do you think? Does it sound like something you would be interested in? In the forum you would be able to post pics IN the thread of your work, and other fun stuff. It would be similar to the yahoo groups but expanded and simpler to use. Also it would cut down on the chit chat emails. Which I don't mind, but for those on digest, or web only it can be trying to muddle through all of the extra stuff.
Thursday, October 18, 2007


Update from Karen!!!!
I've heard from Karen! She has had no news on her cancer and that is a great thing! So far there is no new growth. WOOOHOOO!! She has caught a cold or flu or some type of bug that is bent on world domination ( as it seems as though everyone has the same thing) so she isn't feeling well. She has been keeping up with the groups though and she loves everything that she has seen. Hear that Cathy? We aren't screw ups after all!! LOL! She has been knitting, but she has been keeping her projects simple. Instant gratification. Oh how I love thee! lol!
This one's for you Karen!

This one's for you Karen!
Bits and Bobs UNRAVELED!
For those members who are already a part of Ravelry, I wanted to let you know that we are there too!
Bits and Bobs UnRaveled
We are booming! We already have over 103 members! I am so happy to see how the group is growing over there! So lets get it moving along and start posting! Don't forget to add your intro post to the Intro thread! We love our members and want to get to know you all better. Tell us a little about yourselves so that we know what types of projects are of interest to you!
Don't Forget to check out the KAL thread, in there will be all pertinent information for the UnRaveled KALs. Materials lists, rows, everything KAL related will be posted in there first. All KAL information will also be posted to the blog from all 3 groups, Bits and Bobs, Bits and Bobs 2 Special Projects, and Bits and Bobs UnRaveled.
Also for those on Ravelry, be sure to post your fishie progress in the Fishies thread!
Hugs!
Tiff
Working on the Page, B&B News
Still working on ideas, and if any of you visit my personal blog at all you probably know that this site will continue to grow and evolve as we go. I love adding fun little interactive things that you can play with, so keep your eyes open for new features as I work on this.
I hope to add fun polls, and snapshots, as well as music that will be changed out intermittently. I will be setting up a database for those who wish to contribute to the blog. It will be run similar to a newspaper and you can be the reporters!
Each person will be assigned an area to cover. For example Cathy(if she were to choose to do so) could be assigned the Quilting section. Meaning that it would be her responsibility to post the quilt stitch of the day, pattern of the day, and fabric of the day. The Sections that are getting more feedback such as knitting and crochet will receive more in depth coverage, and therefore one member will be assigned to certain areas of the broader topic. For Example under knitting we would have a team of "reporters" that would each cover their own area. One would be assigned knit pattern of the day. This person would post a link to the pattern with a description of it, and a brief review of the difficulty level and quality level of the pattern. And any personal opinions of it as well. The reporters will be given a description of their duties with their assignments so you will not be running blind here.
More to come!
Wednesday, October 17, 2007
Forums
I will be contacting Cathy to see what she thinks about setting up regular forum times once a month or so. These will be regular times when both she and I or at least one of us will be visiting the blog to help you out in the chat box with any questions you would like answered, or even walk throughs of stitches. We might even set aside certain times to explain the stitch of the week, month whatever. Just a general time for everyone to meet up here and chitchat in real time, and not have to send a bazillion emails.
Tuesday, October 16, 2007
Welcome Bobbers!
Welcome all bobbers! We are so happy to have you here! This will be the place to look for all KAL info and any new news! If you are only interested in the fiber arts related materials, and want less chitchat this is the place to look! This will be our place to post news, and all things fiber related. All KAL rows will be posted here as well as on the group, so if you fall behind just check out our blog!
I can't wait to see how this works out!!!
Hugs!!!
Tiff
List Mom
B&B
I can't wait to see how this works out!!!
Hugs!!!
Tiff
List Mom
B&B
Subscribe to:
Posts (Atom)

